
A Beginner’s Guide to Multi-Channel Home Theater (2023)
Welcome to A Beginner’s Guide to Multi-Channel Home Theater for 2023!
As we know, learning any new topic, like the home theater systems, can be pretty exciting, a bit confusing, and sometimes OVERwhelming.
In this article, we will share with you a fun and EASY way to learn all about multi-channel home theater.
So set your mind to it and get your pen and paper— class in session.
Disclaimer: As an Amazon Associate I earn from qualifying purchases.

When we’re talking about Multi-Channel Home Theater”, you probably have seen it elsewhere, right?
Maybe you saw it at your friend’s house, at the mall, or you get inspired by it while browsing the internet.
Yes, it has a lot of features and benefits, but first, you need to understand your goal, and why would you be interested in it.

I. Main Goal
Let me ask you this…
Do you want to buy a multi-channel home theatre…
So you can have a GREAT TIME with your family and friends while watching a movie with popcorn and soda?
Or do you want to enjoy video games 5x better with surround sound technology?
How about singing in a karaoke (with all your heart) amplified by a cute soundbar or tower speakers?
Or maybe you just want to geek out on your existing sound speaker, figure out why your center channel is soo important, or be amazed at your cute soundbar (again)?
Probably, you want to somehow merge it to your Audio Visual (AV) System?
Or you’re just curious as to what a great home theater system will feel like?
Any reason that you have is a GOOD reason for you to start exploring the amazing world of home theater systems. So let’s go kiddo!

II. Let’s start with the basics
Believe it or not, at some point in time, you have already set up a two-channel stereo system.
Don’t believe it? Let me show you when.
Remember when you connected two speakers at the back of your computer so you get to enjoy the audio of the movie you’re watching?
Well, that is already two-channel audio.
It may not be a surround sound, but that doesn’t matter as yet.
But for a young person with no prior knowledge of speakers… and who just successfully made the speakers work so they can watch Avengers Infinity War with better audio…
Well, that is already a small (surround sound) victory!

III. So what is a two-channel audio?
Before we go to two-channel audio, let us first understand what a channel is.
A channel is any unit or device that produces an audio output. It can be a speaker, a subwoofer, and a soundbar.
Two-channel audio is a classic setup that only requires the left and right speakers. It is positioned on both sides of the room and is connected by an audio cable.
The audio cable splits the audio coming from the Television so you get to hear it on the left speaker and right speakers.
This adds excitement to the movie you are watching. You can hear the Avenger’s command to “Assemble” and you can hear them as if they are coming from the left and from the right.
But would you also like to add a surround sound coming from the back? Just to be more immersed in the movie? Say for example, when Captain America lifted Thor’s Mjolnir. Bravo!
I tell you what, that is very possible. And that is where multi-channel audio or home theater systems come in.

V. Main Benefit of Multi Channel
If you are aiming for a surround sound experience in your sound systems, then you should multichannel.
Here’s one good reason…
Usually, master mixers create a specific format for a particular audio, music or dialogue to be produced in a particular channel (speakers).
This in turn is decoded by the multi-channel audio because the sound distribution depends highly on the audio format.
This means, when this is decoded, you get to listen to different sounds produced by a different channel or speaker.
Now this is the Main Benefit of going multi-channel, you get to have a POSITIVE cinematic experience just like in a theater which will make you HAPPY and FEEL GOOD!
So to make that happen, there are a few formats that will help create this effect: like Stereo, Surround Sound, Dolby Atmos, and DTS:X.
Stereo is the most basic format, with audio coming from two speakers.
Surround Sound uses more speakers, so you get audio coming from all sides.
Dolby Atmos and DTS:X are even more advanced, with speakers above you, making it feel like the surround sound is coming from everywhere, even above!
Later in this guide, we will be focusing more on Dolby and Digital Theater System as they are the ones mostly used in Channel Home Theater System.

Are you learning? Good. So let’s head on to the…
VI. Components of Home Theater Systems
Now that you’re getting a hang of things, you can understand it better by first learning about the different parts and components of a multi-channel home theater.
1. Pre-amplifier (Preamp) and Audio-Video Receiver (AVR)
The Preamplifier and the Audio-Video Receiver work together in home theater systems to deliver CLEAN audio, full of power and clarity.
The preamp makes the audio BETTER by adjusting the volume and tone then sends it to the Audio-Video Receiver.
On the other hand, the Audio-Video Receiver receives the signals from the Source, amplifies them, and sends them to the speakers and the Television (or projector)…. and that is what we watch or listen to.
The Preamplifier and the Audio-Video Receiver can be a piece of separate equipment, or they can be integrated into one device.
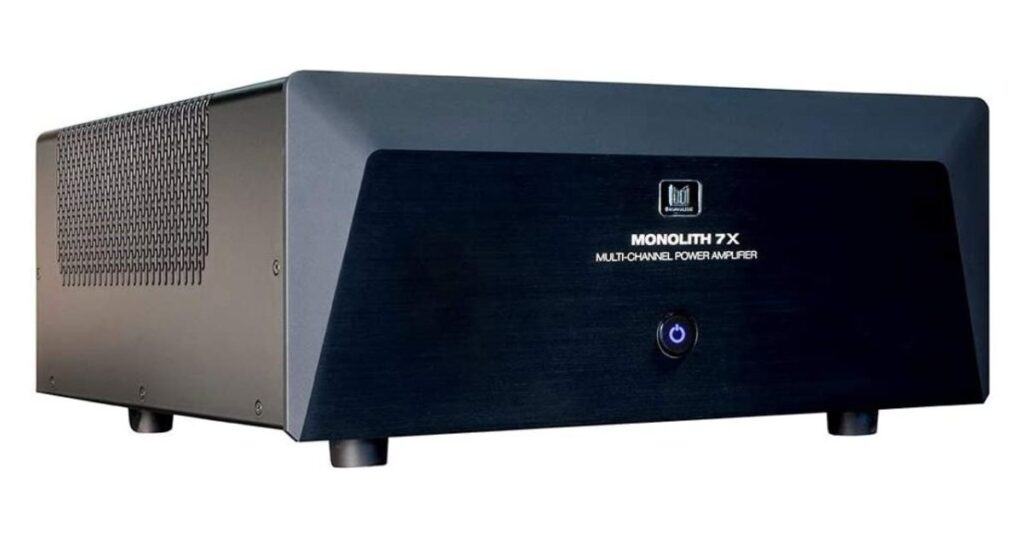
Some of the well-known brands are Marantz, Denon, Arcam, and Monolith by Monoprice.
PRO TIP:
When shopping for an Audio-Video Receiver, look for a model with enough inputs for all your devices and support for the audio format you want, like the software created by Dolby.
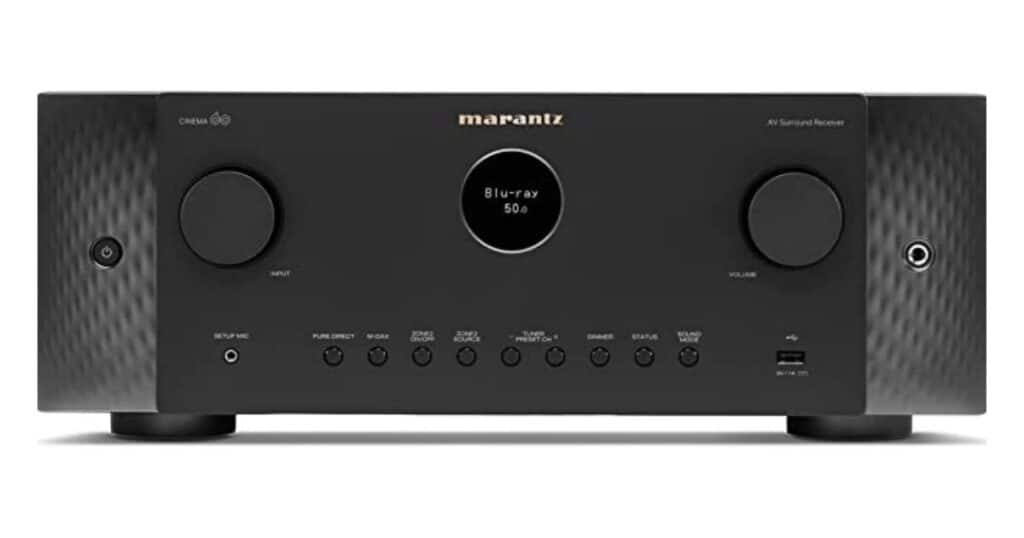
Marantz SR6015 Audio-Video Receiver
2. Speakers
A speaker or a channel produces the sound from the Audio-Video Receiver. They are like the mouth of a multi-channel home theater. They are also called Loud Speakers as they produce channel surround sound in a better and louder manner.
A channel also comes in different sizes, designs, and quality, depending on your budget and setup. They are the main players in powerful sound systems.
Types of Speakers:
a. Floor-standing speakers are a popular channel of choice for larger rooms. They provide powerful, full-range surround sound that rocks!
b. Bookshelf speakers are a more compact channel option, perfect for a small unit and minimalists. They can also deliver premium surround sound quality and are often used in smaller rooms or surround sound speakers.
c. In-wall or in-ceiling speakers are a great channel choice for those who want a more discreet setup, as they can be installed directly into the walls or ceiling.
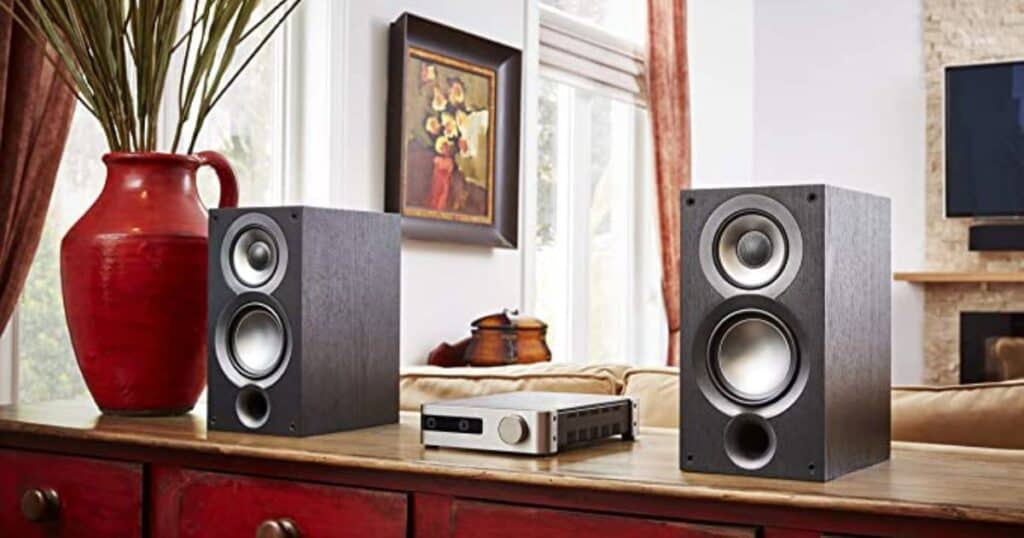
ELAC Uni-Fi 2.0 UB52 Bookshelf Speakers (Pair)
When it comes to power and sensitivity, it’s essential to CHOOSE speakers that can handle the output of your amplifier or AV receiver, say 50 or 100 watts for each speaker.
Moving on…let’s now talk about…
Surround Sound
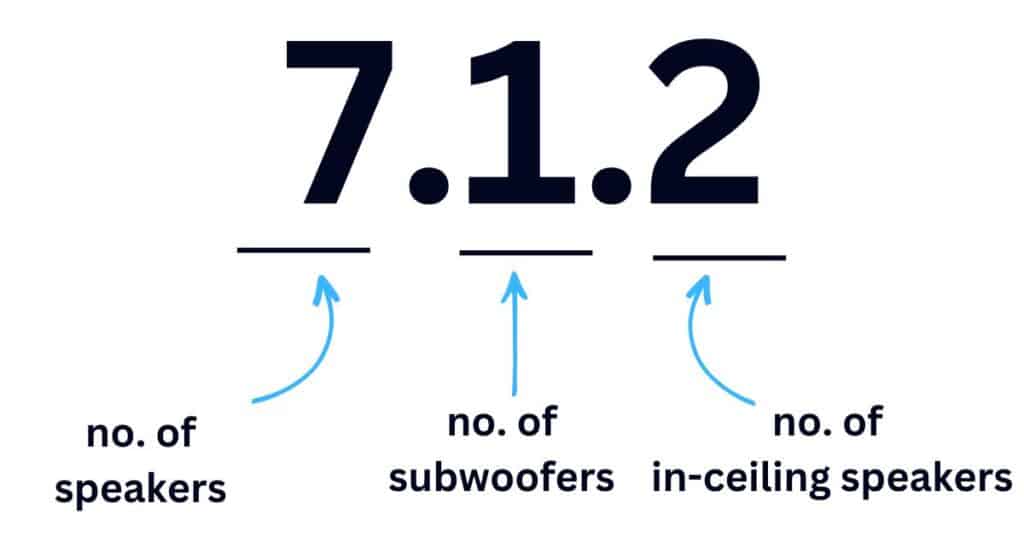
Whenever we talk about surround sound, you will always get to hear the 5.1, 7.1, and 9.1 systems, it only means the number of speakers and a subwoofer. And they are all surround sound. Easy.

For example:
5.1 system has five speakers and one subwoofer.
7.1 system has 7 speakers and 1 subwoofer.
9.1 system has 9 speakers and 1 subwoofer.
And we also have:
7.1.2 system is a 7.1 system + 2 in-ceiling speakers.
9.1.2 system is a 9.1 system + 2 in-ceiling speakers.
Standard Channel Home Theater:
5.1 System (Surround Sound)
If you’re just starting to learn about multi-channel home theater, then this system is HIGHLY recommended for you.
This is the basic ENTRY-LEVEL surround sound system that includes five speakers and one subwoofer.
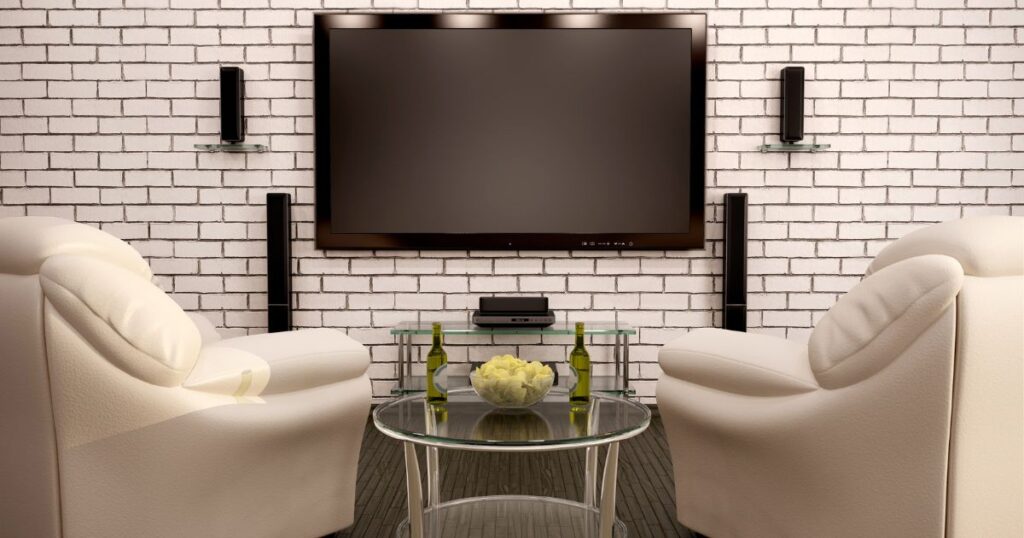
The FIVE speakers consist of:
3 Front speakers (left, center, and right)
2 Rear speakers (left surround and right surround).
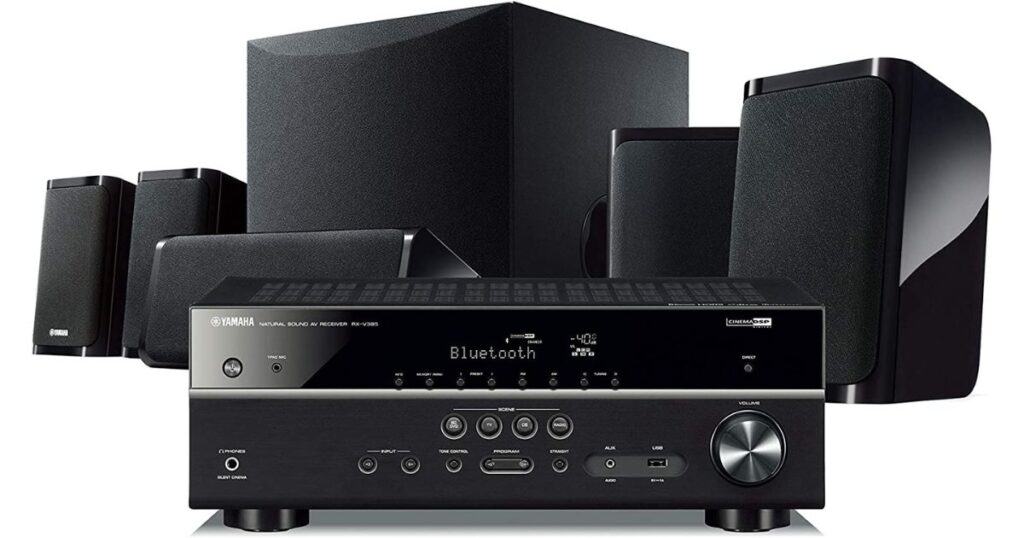
Yamaha Audio YHT-4950U 4K Ultra HD 5.1
So let’s over to the speakers…
The Center Channel or Center Speaker is the MOST IMPORTANT part of the system since 90% of the dialogue will be coming from it. It is positioned in the center, directly below the Television, and at ear level. You can also use a media cabinet to place it.
The Left Front Speaker and Right Front Speaker are placed on the left and right sides of the TV at EAR LEVEL. They could either be bookshelf speakers or floor-standing speakers.
The two Rear speakers, the Left surround speaker, and the Right surround speaker are placed on EACH SIDE of the seating area, and at ear level as well. They could also be a bookshelf speaker or a floor-standing speaker.
The Subwoofer’s placement is a bit tricky because you want to determine its “sweet spot”, which means the position where it can produce the optimum bass for it to be FELT and HEARD.
We have it in the later part of the guide, but for now, you can place it just on the left or right corner of the room, parallel to the television.
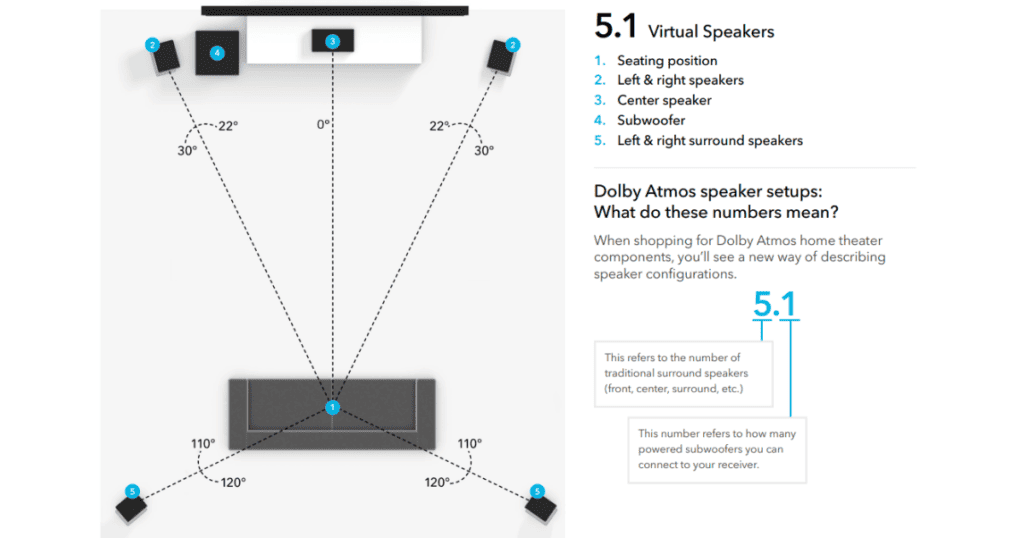
Source: Dolby 5.1 Home Theater Speaker Guide
7.1 System (Surround Sound)
This adds two extra surround speakers (Left Back Speaker and Right Back Speaker) to the 5.1 system. This can provide a MORE immersive surround sound in any channel home theater system.
7.1.2 System (Surround Sound)
This adds two height speakers (Left Height Speaker and Right Height Speaker) to the 7.1 system, resulting in a 7.1.2 system.
This is ideal for Dolby and Digital Theater System audio format that include height or overhead surround sound effects. So if you want to hear Thanos unable to escape from Wanda’s Powers, then this system is worth considering!

Source: Dolby 7.1 Speaker Guide
Advanced Channel Home Theater:
9.1 System (Surround Sound)
This unique system adds two height speakers (Left Height Speaker and Right Height Speaker) to the 7.1 system, resulting in a 9.1 system. This can create a more enveloping surround sound experience with sound coming from above.
9.1.2 System (Surround Sound)
This adds two additional height speakers (Left Rear Height and Right Rear Height) to the 9.1 system, resulting in a 9.1.2 system. If price is not an issue for you, then this is all worth it!
11.1 System (Surround Sound)
This adds two extra surround speakers to the 9.1 system, resulting in an 11.1 system. This provides even more CAPTIVATING surround sound technology.
11.1.4 System (Surround Sound)
This adds four (4) in-ceiling speakers to the 11.1 system, resulting in an 11.1.4 system. This is a very advanced speaker configuration that provides the most fascinating surround sound technology. This is usually seen in well-designed sound systems.
PRO TIP: If you are not sure what system to get, always start with a 5.1 system, learn from it, and adjust according to your needs.
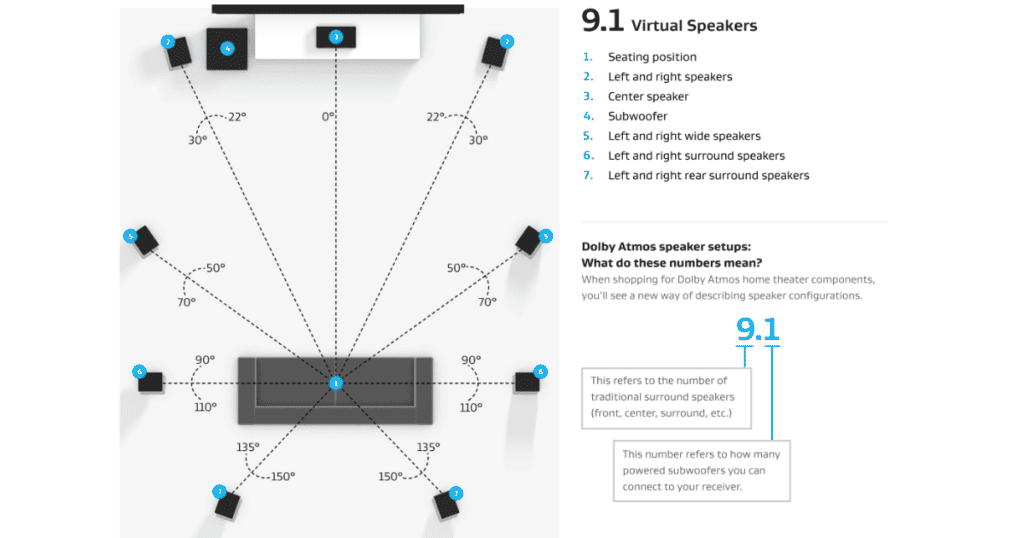
Source: Dolby 9.1 Home Theater Speaker Guide
3. Subwoofer
A subwoofer is a channel bass speaker that produces deep and bassy sounds. These are usually heard in blockbuster movies, orchestra music, rock and roll, explosion effects, and the sound of thunder in movies.
Try to understand that the main purpose of a subwoofer is to make the surround sound effects richer, fuller, and livelier. It gives that “punch” and “power” we are expecting in home theater systems.
It is like the bass guitar in a band, the “do” in the music scale, or in another angle, it’s like “the deep and manly voice of Batman” that many fans try to imitate! (I am Batman!)

So when we are talking about a subwoofer, the simple rule of thumb is…
The BIGGER the room, the BIGGER the subwoofer should be.
Or in another way, the BIGGER the room, the MORE subwoofers.
Yes, we are not limited to 1 subwoofer, we can actually add 1 more.
After all, we are expecting it to give that “depth” and “resounding audio” in a channel home theater system.
Now to understand how subwoofer works, let’s first understand what an “amplifier” is because it has a direct connection with subwoofers.
An amplifier or “amp” is a device that takes low-level audio signals from sources (Blue Ray, Gaming, Karaoke, etc.) and amplifies them with greater power, volume, and sound quality through the sound speakers.
So that’s about amplifiers. Now let’s head on to the 2 types of subwoofers.
Types of Subwoofers:
a. Active Subwoofer:
An active subwoofer is a channel that includes a built-in amplifier inside it which powers up the speaker driver.
This means that it does not require an external amplifier or an AV to work.
The active subwoofer is compact and EASIER to set up, as they only require a power source and a connection to the home theater system’s subwoofer output.
If you are on a budget, then we recommend this type.
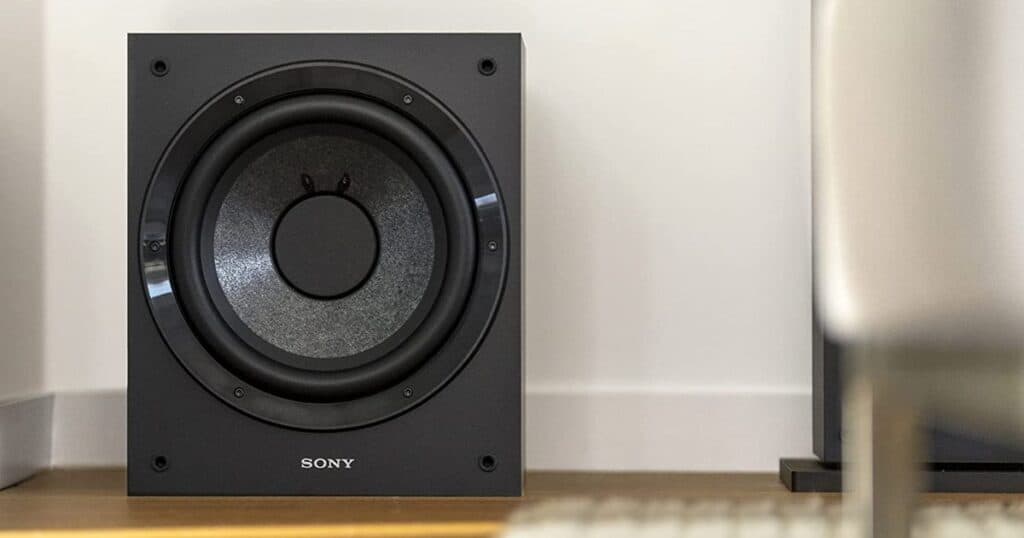
Sony SACS9 10-Inch Active Subwoofer
b. Passive Subwoofer:
A Passive or Powered subwoofer is also a channel but it doesn’t have a built-in amplifier inside it.
Instead, it relies on an external amplifier or AV receiver to power the subwoofer’s speaker driver.
`
Passive subwoofers are often larger and heavier than active subwoofers, as they require more physical components and more power to function.
This makes it also quite challenging to set up.
But the good thing is, they produce “better and louder bass” for a channel home theater. Perfect for a surround sound custom set-up.
They are more affordable than Active Subwoofers but will need an External Amplifier, so in total this will cost more, but it’s worth it.
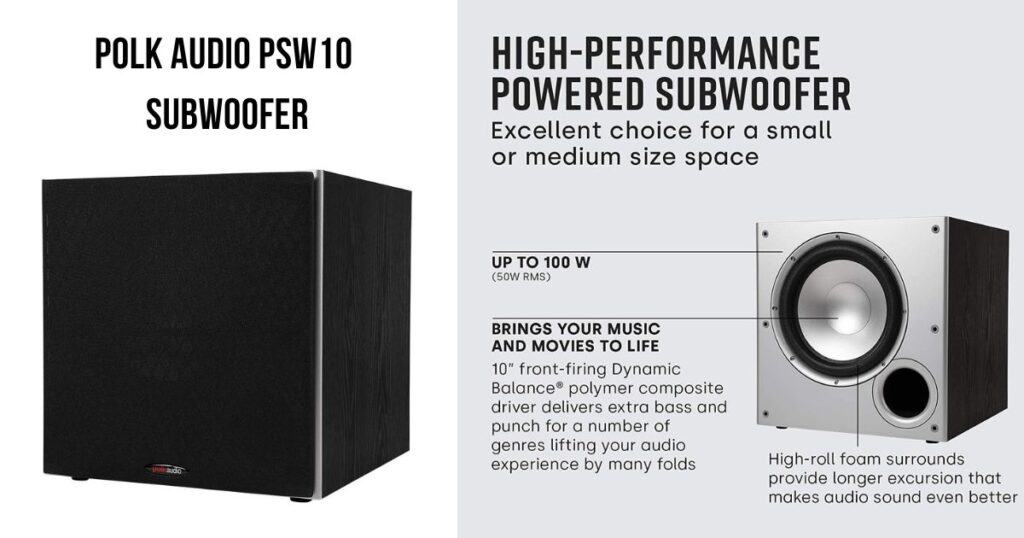
Polk Audio PSW10 10″ Powered Subwoofer
PRO TIP: If you want an easier setup, go for Active Subwoofer. But if you want to learn and explore further, and customize, go for Passive Subwoofer.
4. Source devices
These are the things that play your movies and music, like Blu-ray/DVD players, streaming devices, gaming consoles, and cable or satellite boxes.
They are the brain of your Multi-Channel Home Theater. And you’ll need to connect them to your Audio-Video Receiver.
Types of Source Devices:
Blu-ray player: A Blu-ray player is a disc player that can play high-definition Blu-ray discs. It plays high-quality video and audio for movies and Television shows, perfect to watch Dr. Strange.
Streaming media player: A streaming media player is a device that connects to the internet and stream video and audio content from online sources, like Netflix and Hulu.
Gaming console: A gaming console, like the Xbox or PlayStation, can be used to play video games, as well as in streaming media and Blu-ray discs.
Cable or satellite box: A cable or satellite box is a device provided by a cable or satellite provider that can receive and decode television signals.
PRO TIP: When choosing source devices, make sure the source device is compatible with your system. Check the specifications to ensure it can output the necessary video and audio format for your system.

Sony BDP-BX370 Blu-ray Disc Player
5. Display devices
Displays are an essential component of a multi-channel home theater system, providing the visual component of the audio and visual experience. They come in a variety of sizes and technologies, including flat-screen televisions, projectors, and screens.
Displays for Channel Home Theater
Flat-screen television: A flat-screen television is a common type of display that can be mounted on a wall or placed on a stand. They come in a variety of sizes and technologies, including LCD, OLED, and QLED.
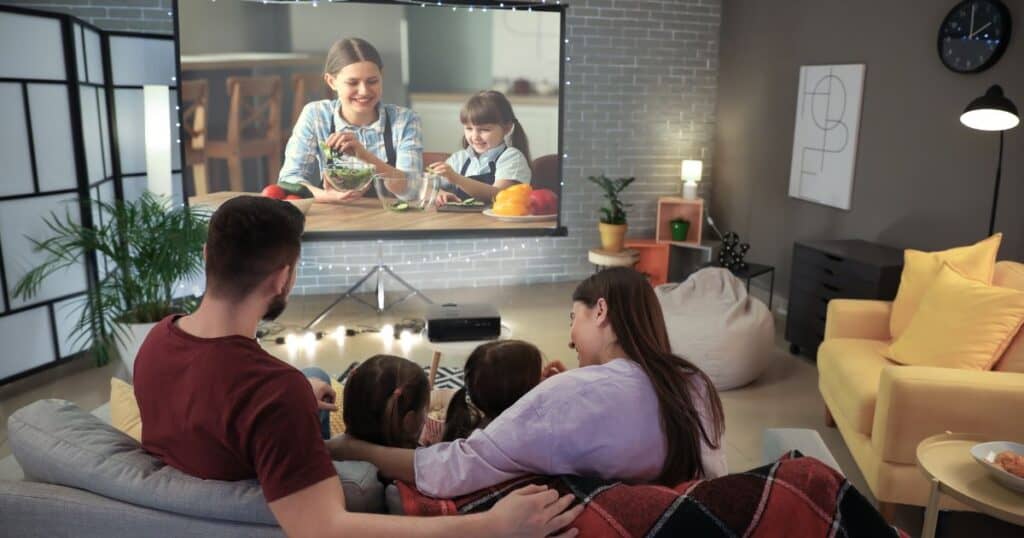
Projector: A projector is a device that projects an image onto a screen or wall. They can provide a larger image size than a flat-screen television and can be used in rooms with more limited space.
Screen: A screen is a surface onto which a projected image is displayed. They come in a variety of sizes and materials, including fixed screens and retractable screens.

TCL 50″ Class 4-Series 4K UHD HDR Smart Roku TV
Choosing the right display:
Here are some of the factors to consider when choosing a display for your home theater systems:
Room size: This will affect what kind of display you can use. If your space is large enough, you may want to opt for a projector and screen instead.
Technology: When buying a Television, consider what type of display technology is best for you and your budget. Liquid crystal displays (LCD) are typically less expensive than organic light-emitting diode (OLED) or quantum dot LED displays—but they may not provide the same level of image quality.
Resolution: To ensure the best image quality, look for TVs with high-resolution capabilities—such as 4K or 8K.
Compatibility: Make sure that the display you buy is compatible with your home theater systems and can accept whatever input signals are needed, such as HDMI or DisplayPort.
Viewing angle: Consider the viewing angle of a display if you plan for multiple people to use it. The wide-angle display ensures that everyone can see what’s on the screen clearly, while narrow or fixed angles may make some viewers uncomfortable or unable to enjoy visuals together with others.
PRO TIP: If you plan to use your display for gaming, look for one with a high refresh rate. This ensures that your game will be more responsive so you’ll have a more enjoyable gaming.

6. Cables
Cables are critical to connecting each and every component. They are the nerves of our home theater system.
Just like how a nerve transmits signals to our brain, cables transmit audio and video signals between the AV Receivers, Speakers, Source Devices, and Display Devices so we get an image in the Television or a sound in a speaker.
Now we can watch Ironman on the big screen and listen to the epic background music when he wore the Infinity Gauntlet and snapped it with all his determination! (Poof!)

Now back to the topic…
Since cables are so useful and super important, we need to know and understand the types of cables and their functions.
Types of Cables:
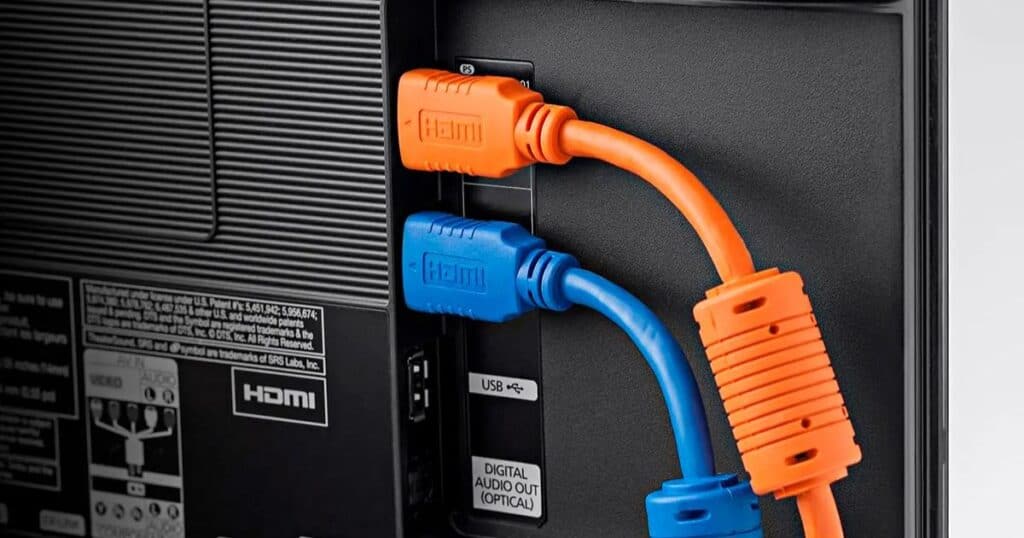
HDMI Cables: High-Definition Multimedia Interface (HDMI) is the most popular and versatile cable used in home theaters and AV systems.
It carries both high-definition video and multi-channel audio signals.
Given their functionality, they are now available in different versions, such as HDMI 1.4, HDMI 2.0, and HDMI 2.1, each supporting different features and capabilities.
Get high-quality HDMI Cables even though the price is higher. This is to ensure that video and audio are up to AV standards.
Monoprice 4K High Speed HDMI Cable
Optical audio cable: An optical audio cable, also known as TOSLINK or SPDIF, is used to transmit digital audio signals.
It is commonly used to interconnect audio sources like Blu-ray players, gaming consoles, or streaming devices to the audio receiver.

RCA cables: RCA cables are those classic cables with red, white, and yellow connectors.
They are often used for analog audio connections usually in older audio devices or to speakers and AV receivers.
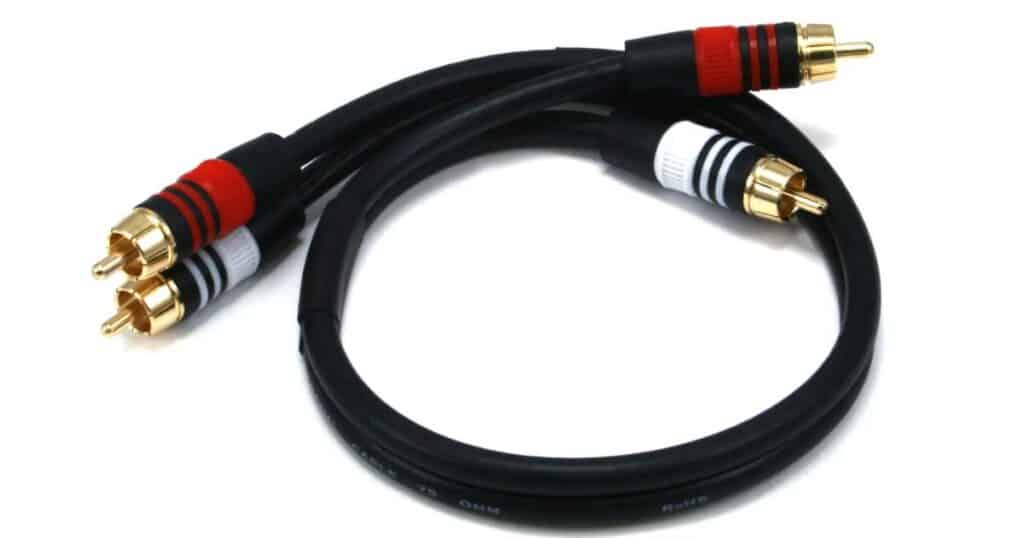
Monoprice 3ft Premium 2 RCA Plug/2 RCA Plug M/M 22AWG Cable
Ethernet cable: An Ethernet cable connects the internet (via the router) to the Television so you can easily stream Netflix, Hulu, or Disney+. It is the same cable that connects your desktop to your router.
Category 6a(Cat6a) and Category 6 (Cat6) are the most used cables for multi-channel home due to their higher capacity to transfer data.

Monoprice Cat6a 5ft Patch Cable (10-pack)
Speaker wires: These connect speakers to the audio receiver or amplifier. It carries the audio signal from the receiver to the speakers, to produce an accurate sound reproduction.

Monoprice Speaker Wire, CL2 Rated, 2-Conductor, 14AWG (100 ft)
PRO TIP: Tag your cables properly so you can easily know what device it is connected to.
Now that you are becoming familiar with the components of a multi-channel home, let’s try to set it up.
Time to create a game plan!
VII. Planning The Viewing Space
Before you start setting up your home theater system, it’s always a good practice to think about the space you will use.
Consider its size and layout, as well as things like soundproofing, seating, and lighting. Once all of these criteria are well-considered, you will definitely have a good system in place.
1. Room dimensions and layout
The size and shape of your room can affect how your home theater system performs.
Bigger rooms need more speakers for better audio, while smaller rooms might require fewer.
2. Acoustic treatment and soundproofing
Good sound quality is important for a home theater system. So add some soundproofing and acoustic treatment to your room.
Soundproofing keeps outside noise from coming in, while acoustic treatment helps control how sound bounces around inside the room.
You can use things like curtains, rugs, and foam panels to help with this.
3. Seating and viewing distance
The distance between the TV and you should not be too close or too far as well. You should find the perfect spot for a comfortable viewing experience.
The distance can also affect the size of the TV you’ll choose as well as the placement of your speakers.
4. Lighting considerations
Depending on the occasion, you should control the lighting in your entertainment room.
Watching movies is best in a dark room, so make sure you can block out any outside light. You might also want to add some dimmable lights, so you can set the perfect mood for movie night.
But if you’ll be watching the NBA, better get the lights on!
Now that you’ve planned your space and have all your components, it’s time to set everything up! As Nike said, “Just do it!”

VII. Setting Up Your Multi-Channel Home Theater System
1. Speaker placement
Position your speakers at strategic points so you can get the best sound possible. This is one of the most important steps in setting up multi-channel home theaters.
Front left and right speakers: Place these on either side of your screen, about ear level when you’re sitting down. Angle them slightly toward your seating area.
Center speaker: Put the center channel right above or below your screen, also at ear level.
Surround speakers: Place these to the sides and slightly behind your seating area, also at ear level. If you have more than two surround speakers, spread them out evenly around the room.
Height speakers (Dolby Atmos): These go on the ceiling or high on the walls, above your seating area.
2. Subwoofer placement and calibration
Finding the best spot for your subwoofer takes a little bit of trial and error.
Start by placing it in a corner of the room, and move it around until it sounds best.
Or you can also start by placing it in your sitting position and do a “subwoofer crawl” by moving to different parts of the room and studying and listening to the bass.
Then once you found the “sweet spot”, exchange the subwoofer into that position.
After that, calibrate the subwoofer’s volume and settings according to your AVR’s instructions.
PRO TIP: Don’t put your center channel or any other speakers on top of the subwoofer because it may accidentally slide and fall and might get damaged because of the bass and vibration produced by the subwoofer.
3. Connecting components to the Audio/Video Receiver
Use those HIGH-QUALITY cables to interconnect all your source devices, speakers, and display devices to the Audio/Video Receiver.
And make sure you’re using the RIGHT cables and inputs for each device in order to build a good channel home theater system.
Refer to the User’s Manual if you want it done correctly.
4. Display device setup
If you’re using a projector, position it properly to FIT the size of the projector screen.
And if you’re using a TV, make sure it’s mounted correctly at the right height for comfortable viewing.
VIII. Calibration and Fine-Tuning
Once everything is set up, it’s time to calibrate and fine-tune your home theater system for the best sound and picture quality.
1. Built-in calibration tools
Many AVRs come with built-in calibration tools that can HELP you adjust settings like speaker levels and distances. Follow the instructions in your AVR’s manual to use these tools.
2. Manual calibration techniques
You can also fine-tune your system manually by adjusting settings like speaker levels, distances, and crossover frequencies.
Use a tape measure to FIND the distance between your speakers and seating area, and adjust the settings accordingly.
You can also use a sound level meter to make sure all your speakers are playing at the same volume.
3. Room correction software
Some AVRs come with room correction software. This optimizes your home theater system for your specific room.
It works by measuring how sound bounces around your room and makes adjustments to improve the sound quality of your channel home theater system.
IX. Maintaining and Upgrading Your Home Theater System
Just like any other device, you need to maintain your channel home theater system properly. You need to put some love and care into your systems, so it will work and sound at its best!
Regular maintenance tips
Clean your components: Dust and dirt affect the sound and picture quality, so make sure to clean your speakers, Audio-Video Receiver, and display devices regularly. Use a soft microfiber cloth or a special electronic cleaner to clean the entire system.
Check your connection systems: Over time, cables can become loose or damaged. Make sure all your cables are connected securely and replace any damaged ones.
Update your software: If your Audio-Video Receiver or other devices have software updates available, be sure to install them. Updates can improve performance and fix issues.

When to upgrade components
As technology improves, you can always upgrade parts of your home theater system. Here are the signs for upgrade:
New audio or video formats: If a new audio or video format comes out that your current components don’t support, it’s time to upgrade to enjoy the latest technology.
Performance issues: If your components are old and starting to have performance issues, like poor sound or picture quality, it’s time to upgrade for better viewing activity.
Expanding your system: If you want to add more speakers, a bigger screen, or new devices, it’s time to upgrade your Audio/Video Receiver or other components to support the changes.
Staying updated with the latest technologies
To make sure your home theater system stays up-to-date, watch out for the latest news and trends in audio technology. You can follow blogs(like our page), magazines, and online forums to stay updated with the newer systems being introduced in the market.

And just as we mentioned in the first part of this article, it’s a must that we learn about the two(2) groundbreaking technology that revolutionized the way we experience audio – Dolby Atmos and DTS:X.
X. The Sound Magic of Dolby Atmos and DTS:X
Prepare to be amazed as we unravel the MAGIC behind this cutting-edge technology and discover how it can ELEVATE your entertainment to new heights. (Deep Voice of Dolby the Magician…Whoosh!)
So yes. Dolby Atmos and DTS:X are pieces of spacial sound software that are very popular in the audio world and give a sort of power to big systems.
It’s main power? It STEPS UP the caliber and power of audio, like magic.
Now let’s try to understand them both…
Dolby Atmos: A Sonic Marvel
Imagine being surrounded by audio that comes alive from EVERY direction, above and around you.
Dolby created Dolby Atmos to make this possible by introducing three-dimensional audio that redefines the way we perceive sound.
Unlike traditional surround sound formats, which RELY on separate channels, Dolby Atmos utilizes object-based audio technology.
Dolby allowed sound engineers to precisely position and move sounds in a virtual 3D space, creating a breathtakingly realistic and awesome audio environment.
How does Dolby Atmos work?
It works by assigning sounds to specific locations rather than channels, then it ENABLES audio to move freely around you, even overhead, resulting in a truly captivating experience.
Then there is a combination of ceiling-mounted speakers, upward-firing speakers, or overhead speakers, along with traditional speakers, to achieve its awe-inspiring effect as adapted by many systems.
Whether it’s the raindrops falling from above or the whisper of a gentle breeze, Dolby Atmos ensures that you HEAR every subtle detail with astonishing clarity, depth, and power!

DTS:X: Unleashing the Full Potential of Sound
If you’re seeking a truly versatile and impressive audio format, DTS:X is here to deliver.
Developed by Digital Theater Systems, it is also an object-based audio technology that offers a seamless 3D sound experience.
Designed to ADAPT to any speaker configuration and room layout, it provides incredible flexibility, making it an excellent choice for various home theater setups.
How does DTS:X work?
It simply takes advantage of its object-based approach to enable sound objects to move freely in a 3D space, just like Dolby.
However, what sets them apart is their ability to OPTIMIZE sound placement based on your specific speaker setup and room acoustics.
By calibrating the audio to your unique environment, it ensures that you experience the FULL IMPACT of 3d surround sound, regardless of your speaker configuration.
Amazing Benefits of Dolby Atmos and DTS:X
Now let’s look at the Amazing Benefits of these Audio Softwares

1. Elevates Your Home Entertainment Experience
Both software offers a remarkable leap forward in audio technology, allowing you to create a truly cinematic experience in the comfort of your own living room.
Whether you’re watching a movie, playing video games, or listening to music, these formats breathe new life into your entertainment content.
2. Immersive Movies and TV Shows
With both software, movies and TV shows become a feast for your ears.
Feel the rush of an action-packed scene as helicopters soar overhead, or get lost in the subtle ambiance of quiet dialogue. The multidimensional soundstage adds a new layer of depth, enhancing the emotional impact and realism of every moment.
3. Gaming Like Never Before
For gamers, both software brings an unparalleled level of immersion to your gaming sessions.
The ability to pinpoint sounds accurately in a 3D space adds a new dimension to gameplay, giving you a competitive edge and enhancing the overall gaming experience.
Whether it’s the sound of footsteps creeping up behind you or the roar of an engine approaching from a distance, these technologies ensure that you never miss a beat.
4. Music that Surrounds You
With both software, music transcends the boundaries of traditional stereo setups. Imagine being enveloped by your favorite song, with instruments and vocals coming from different directions, creating a captivating concert-like feeling.
Whether you’re a music enthusiast or a casual listener, both software allows you to rediscover your favorite tracks with a newfound richness and depth.

Compatible Devices and Setup
To fully enjoy the wonders of the software of both Dolby and Digital Theater Systems, you’ll need compatible devices and a proper setup. Fortunately, these technologies have become increasingly accessible, with a wide range of options available.
1. Home Theater Systems
Many home theater systems now come equipped with software support from both companies.
Be it from speakers to dedicated AV receivers of great systems, it is now capable of decoding audio formats.
By investing in a compatible home theater system, you can create a true cinema-like experience in your living room.
2. Soundbars and Smart Speakers
If space, price, or budget constraints limit your options, don’t worry! Both software is also available in a soundbar and a smart speaker.
A 2.1 or 5.1 soundbar is like a mini system, it encloses a left channel, a center channel, a right channel, and even a subwoofer.
While a smart speaker is usually a portable speaker system with a built-in AI assistant.
Both a soundbar and a smart speaker are compact yet powerful devices that utilize advanced sound projection techniques to create a virtual 3D soundstage.
Simply hook them up to your TV or audio source, and let the magic unfold.
3. Mobile Devices and Headphones
Want to enjoy both software on the go? Many smartphones and tablets now support these formats, providing a one-of-a-kind audio experience through built-in speakers or headphones.
Just plug in your headphones and dive into a world of captivating sound, whether you’re watching movies, playing games, or listening to music.
Content and Streaming Platforms
To FULLY experience the wonders of both software, you’ll need content that supports these formats.
Fortunately, a growing number of movies, TV shows, and music albums are being released with Dolby Atmos and DTS:X audio tracks.
Streaming platforms like Netflix, Disney+, Amazon Prime Video, and Tidal offer a wide selection of content with captivating audio.
When browsing for content, look for their logo or check the audio specifications to ensure compatibility.
With an INCREASING library of amazing content available, you’ll have no shortage of captivating experiences to explore.

Dolby Atmos vs. DTS:X
Now, which one is better? The truth is, both of them offer incredible audio experiences that will blow you away.
The choice between them boils down to personal preference and compatibility with your devices and content.
Some argue that Dolby Atmos has a wider availability of content and is more widely supported across devices. However, DTS:X is catching up and gaining ground.
VERDICT: It’s a Tie!
Bonus Guide# 1: Home Theater Gaming

Playing video games on a BIG screen will take your gaming experience to the NEXT LEVEL!
Here are 3 Easy steps to integrate gaming into your home theater system.
1. Choosing the right gaming console or PC
The first thing you’ll need is a gaming console or PC.
Popular gaming consoles like PlayStation, Xbox, and Nintendo Switch all support multi-channel audio and high-definition video.
If you prefer PC gaming, make sure your computer has a powerful graphics card and supports multi-channel audio output.
When choosing a gaming device, consider the games you like to play and the features you need, such as online gaming or virtual reality (VR) capabilities.
2. Connecting your gaming console or PC to the Audio-Video Receiver
Once you have your gaming console or PC, connect it to your Audio-Video Receiver using an HDMI cable or another appropriate connection.
This will allow your Audio-Video Receiver to send the video to your display device and the audio to your speakers.
Make sure it supports the latest HDMI version and has enough input for all your gaming devices.
3. Gaming Optimization
To get the most out of gaming in your home theater system, you’ll want to optimize your system for the best performance. Here are some tips:
Game mode: Some TVs and projectors have a “game mode” that reduces input lag. This will drastically improve your gaming experience. Check your display device’s settings to see if this is available and enable it when gaming.
Audio settings: Make sure your Audio-Video Receiver is set to the correct audio format for your gaming console or PC. This may include the software of Dolby and Digital Theater Systems.
Seating and viewing distance: Gaming may require different seating and viewing distances than watching movies. Make sure your seating is comfortable and at the right distance for both gaming and movie watching.
Lighting: Good lighting is important for gaming, so consider adding adjustable or ambient lighting that you can change depending on whether you’re gaming or watching movies.
Bonus Guide # 2:Home Theater Karaoke

Aside from experimenting and singing your national anthem on your multi-channel home theater system, it is also perfect for karaoke nights!
With a large screen and powerful speakers, you can host epic karaoke parties for your friends and family! (Wohooo!)
So here are 4 Easy Steps to set up your singing karaoke.
1. Choose a System:
Standalone karaoke machines: These devices come with built-in speakers, microphones, and a library of songs. You can interconnect them to your Audio-Video Receiver and display device using the appropriate cables.
Karaoke apps or software: Many streaming devices and smart TVs have karaoke apps that offer a vast collection of songs. Alternatively, you can use karaoke software on your PC or laptop, connected to your Audio-Video Receiver and display device.
Karaoke microphones: Some microphones come with built-in karaoke features, like song libraries and Bluetooth connectivity, allowing you to stream karaoke tracks from your phone or tablet to your home theater system.
2. Connect your karaoke system to the Audio-Video Receiver
Once you have chosen a karaoke system or device, hook it up to your Audio-Video Receiver using the appropriate cables or wireless connections. Ensure it has enough input for your karaoke device and that it supports the formats used by the device.+
3. Setup microphones and audio settings
A good karaoke experience requires clear and powerful vocals. Here are some tips for setting up microphones and audio settings for karaoke:
Microphone placement: Position the microphones at a comfortable distance from your seating area, so singers can easily reach them. You can also consider using microphone stands or wireless microphones for added flexibility.
Audio settings: Adjust your AVR’s audio settings to emphasize vocals during the karaoke session. This includes increasing the center channel volume or using a “vocal boost” setting if available. You can also use the AVR’s equalizer settings to fine-tune the sound.
Microphone feedback: To avoid feedback, make sure the microphones are not pointed directly at the speakers. You can also use feedback suppressors or adjust the microphone volume to minimize feedback.
4. Create the Perfect Karaoke Atmosphere
To make your karaoke nights even more fun, consider these tips for creating the perfect atmosphere:
Lighting: Set up fun and colorful lighting to create a party-like ambiance. You can use disco lights, LED strips, or even a simple dimmer switch to create the right mood.
Seating: Provide comfortable seating for your guests, with enough space for everyone to see the screen and sing along.
Song selection: Offer a wide variety of songs to cater to different tastes and make sure everyone gets a chance to sing their favorite song.
So you can see the power of karaoke. Let’s head on to the next.
Bonus Guide #3: Home Theater Education

You may be surprised about how online education is played on Multi-Channel Home Theater.
With the RISE of online learning platforms and educational content available on streaming services, you can transform your home theater system into a virtual classroom.
Here are the steps to setup one:
1. Choose a Learning Platform:
Online courses: Many reputable online platforms offer a wide range of courses, covering various subjects and skill levels. Platforms like Coursera, Udemy, and Khan Academy provide courses taught by experts from around the world. You can stream these courses on your home theater system to immerse yourself in the educational material.
Educational documentaries: Streaming services like Netflix, Amazon Prime Video, and Disney+ offer an extensive collection of educational documentaries. Explore these history, science, nature, and other topics to expand your knowledge.
TED Talks and educational podcasts: TED Talks and educational podcasts are excellent sources of inspiration and learning. Use your home theater system to watch or listen to these thought-provoking talks and discussions.
2. Optimize for Online Education
To enhance your online education experience with your home theater system, consider the following tips:
Display settings: Adjust the display settings of your television or projector to ensure clear and legible text. Increase the font size if needed, and adjust brightness and contrast to reduce eye strain during long learning sessions.
Audio settings: Set your audio system to prioritize clear dialogue and enhance the audio experience. Adjust the audio settings on your Audio-Video Receiver to optimize speech intelligibility.
Note-taking tools: Keep a notebook or digital device handy to jot down important points, take notes, or make mind maps while watching educational content.
Discussion forums: Join online communities or discussion forums related to the courses or topics you are studying. Engage with other learners, ask questions, and provide insights to deepen your understanding.
3. Create a dedicated learning space
Consider setting up a dedicated learning space within your area. This space can be designed to promote focus and concentration, ensuring an optimal learning environment. Some suggestions for creating a dedicated learning space include:
Comfortable seating: Choose a comfortable chair or seating arrangement that supports proper posture and allows for long hours of learning without discomfort.
Proper lighting: Ensure adequate lighting in the learning space to minimize eye strain. Use adjustable lighting options to control the ambiance and brightness as needed.
Distraction-free environment: Minimize distractions by organizing and decluttering the space. Keep the area free from unnecessary items and distractions to help maintain focus.
Frequently Asked Questions:
1. Can I just use a Soundbar instead of the 5.1 setup?
Answer: Yes. Soundbar is like the modern multi-channel home theater setup put into a compact and sleek device. Inside the casing, it may house two, three, or five channels and a subwoofer depending on the model. A soundbar is a cheaper and easier alternative to a 5.1 system. But it has its pros and cons. We have a separate article for a soundbar.
2. Which is a better Source for a Channel Home Theater, a TV or a Projector?
Answer: Depending on your use, TVs of every size are usually inside the room. While a projector can be used for bigger rooms, in movie theaters, or outdoors using a projector screen.
3. How many channels do you recommend for a beginner setup?
Answer: We can recommend a 5-channel and 1 subwoofer setup or commonly known as 5.1 setup.
The reason is, you can always increase it later on, but it’s best to start at a minimum of 5 channels and work it out later on.
XI. Conclusion
Congratulations! You have now virtually graduated from beginner to intermediate! Thanks for your time in reading all the information about our guide.
Remember, reading this article will EQUIP you with the foundational concepts of the home theater system so you get an overview of how EASY it works once you understand its concepts.
But of course, every piece of knowledge gained needs to be tested in real life.
You can start planning first before you make any purchases. The best recommendation is to start low-key with a 5.1 Setup, then learn from it slowly.
If budget is an issue, then you can simply start off with a regular soundbar.
Feel free to read and review this guide again so you can understand things better.
Good luck on your Multi-Channel Home Theater Journey. You can do it!